Showing posts with label winter. Show all posts

Tuesday, October 8, 2013

Celebrate IBW 2013 - Babywearing through the Seasons

This week we celebrate International Babywearing Week 2013.  This year's theme is "Get Carried Away!"  In today's post, Pamm tells us how you can Get Carried Away no matter the season.
 
Babywearing makes loads of sense in the mild climates of fall and spring, but some parents ask if it is too hot to wear baby during the summer, and the answer is no! Babywearing can actually help you stay in more tune with baby’s temperature and hydration needs than other methods.
 
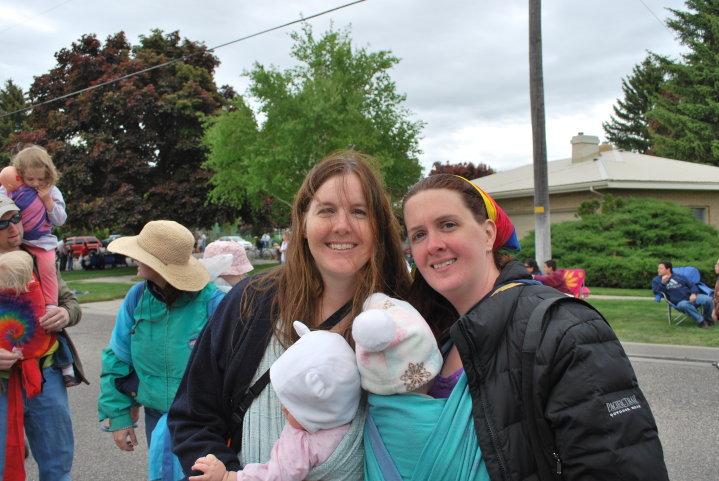
This past summer, babywearing helped us brave the crowds during a busy 4th of July Parade, and made a cozy nap spot in the midst of a lot of stimulation.
 
Babywearing kept us hands-free everywhere from the public bus in Virginia Beach to flying kites on the Jockey Ridge dunes in North Carolina.
 
On the beach, the Wrapsody Water Carrier (borrowed from the BWI library) helped me get baby fed and napped without leaving the fun of the shore.
 
We wrapped up our summer adventures with a morning harvesting potatoes at Great Country Farm where, once again, the ability to get one or the other (or both) of the kids up saved the day and kept the fun going.
 
Now that fall is in full swing, we love wearing our boys on evening walks, to pumpkin patches, and during yard work.
 
When winter hits, there is no need to stop babywearing. Wearing is a great way to keep baby warm and cozy and to closely monitor baby's temperature and needs. 
 
When baby is in a front carry, a large winter coat or maternity coat can fit over both wearer and child.
 
 
In a back carry, each person can wear their own coat or you can share a special babywearing coat. (We have a Suse’s Kindecoat.) Such coats are even great for spring showers, when the seasons change yet again.


Posted by Pamm


Friday, January 13, 2012

Winter Newborn Wearing

Last winter I did a post talking about Winter Babywearing, and a lot of what I talked about could apply from newborn - toddler, but today we're going to focus on those newbies.  Wearing your baby leaves your hands free to hold railings when walking down potentially slippery stairs. 

One thing to consider when wearing a newborn is what type of carrier will be a good choice?  Many of the best choices for newborns in general are also great for newborns in winter.  A ring sling, stretchy or woven wrap can be a great choice because they are easy to put on under your coat before leaving the house.


I have had 3 winter newborns.  I didn't wear all of them, but I did get a chance to try out a variety of ways for keeping newborns comfortable in the winter.  None of the carseat/stroller cover/blanket combinations that I tried made me feel as confident that my baby was comfortable as babywearing did.

A few general notes:  Always make sure that your baby has an open airway and a path to fresh air.  If it is so cold out that your baby will suffer from breathing the fresh air, it is too cold and you need to find shelter.  I like to dress babies in layers.  With my oldest I always put a onesie under her clothes, my second and third were warmer babies and didn't like the extra layer.  I also used fleece footie jammies a lot.  Babylegs (or cut off adult knees socks) over or under pants were nice because they could be removed if you were moved into an indoor location that was warm.  I preferred to use my jacket instead of trying to put a jacket on baby.  It made loading them in the sling a lot faster, and it meant they shared in my body heat.  I always knew if they were too warm or too cold because we were sharing the same heat.  So, if I was hot or cold, so was baby.


As for how to do the carrying.  I recommend putting your carrier on before you leave the house.  Wrap or ring sling under your coat.  Then when you get to your destination, you can pop baby out of the carseat and into the carrier before they've had a chance to register the cold.  With a woven wrap a FCC or kangaroo carry can be a nice poppable option.  With a stretchy, the standard PWCC works fine.


I do recommend a hat for your baby.  It can easily be removed when you get inside and tucked in your pocket.  I also recommend unzipping your jacket or removing it once inside to help prevent baby from overheating.


Use extreme caution if nursing in a carrier in a coat with a newborn.  I did do it with my 3rd while taking the older kids to the playground, but I made sure to remain VERY aware of when the suckling slowed so that I could readjust her position.  If you feel you are in a situation that you will be distracted, I recommend not nursing inside the coat.


When wearing a newborn, you do not need a babywearing coat, an oversized jacket that you wore while pregnant will do the job just fine.  Once baby is a little older and you are regularly doing back carries, a babywearing jacket might be a worthwhile investment.  You can also DIY.  Hiking with baby in a back carry under a coat is a wonderful wintertime activity.  Enjoy the fun of wearing your baby and sharing your heat. :)

Monday, November 30, 2009

Cold Weather Wearing: DIY Babywearing coat


Now that the cold weather should be here (maybe next week), let's talk about how to wear your child and keep you both warm.  Yes, you could spend the money on a dedicated babywearing coat, but you could just as easily convert a coat to accommodate both you and your little precious bundle.  Here is a fabulous tutorial that I used that was easy to follow even with my novice sewing skills.  These instructions were translated from German and used with permission from Nancy, with slight editing.

Choosing a coat & choosing fleece:
The coat I chose was a down coat, two sizes larger than what I normally wear.  I found it at our local thrift

store for less than $10.  As for the fleece, I just picked out something from our local fabric store that I thought would coordinate with the jacket.  I went a step further and found some faux fur to line the top of the pocket.

How big should the opening be?
I made my opening 23 cm x 57 cm, and measured down only 12 cm from the back seam of the jacket.

My coat had a slippery lining, and I had to pin the two layers carefully together, then run two (not one) lines of basting before I started zigzagging.  THIS IS VERY IMPORTANT.  OTHERWISE YOU WILL HAVE A MILLION FEATHERS EVERYWHERE!! A helpful hint if you’re using a down coat, try to create a “valley” in the down so that your stitching and subsequent cuts will only have to go through the fabrics layers of the coat, not through feathers.

Carefully zigzag two lines of stitching, one on either side of the basting line. Make sure not to overlap the two lines of zigzagging, since you’ll be cutting between them.


Carefully cut between the two lines of zigzagging. This will leave you with a coat that has a 3-sided flap cut out, STILL CONNECTED along the bottom edge.


Vertical fleece inserts
:
To cut your fleece, fold it so that the stretch goes perpendicular to the fold. Cut TWO of these pieces. (Note that it’s cut on the fold so that the insert is a DOUBLE LAYER of fleece!)   The piece should be a total of 61 cm long (draw the curve, starting 9 cm from the bottom), and 13 cm wide. I drew the curve freehand, which worked fine. (Then, to make sure the curves matched, I used the first piece I cut as a template for the second.)

Zigzag the open edges of the folded fleece piece together. Make sure the right side of the fleece is facing out! (This makes it tons easier to deal with.)

Match right sides of the fleece insert and the coat together, lining up the curved side of the fleece piece with the CENTER of the coat flap you’ve cut. (I.e., the curved side of the fleece will be sewn to the flap, while—eventually—the straight edge will be sewn to the main part of the coat.) NOTE: make sure when you line up the bottom of the fleece piece that there’s not going to be a gap once its sewn—i.e., you need to scootch the fleece piece down maybe 5mm to allow for a seam allowance at the bottom edge.

Sew the flap and the fleece piece together, with about a 6mm seam allowance.

Trim off any of the fleece piece that rises above the flap.

Do the same with the second side.

Fleece across the top of the flap
:
The next piece you’ll cut and sew is the fleece piece that goes across the top of the flap. With the stretch of the fabric going in the SAME DIRECTION as the fold, fold your fleece. Cut a piece that’s 9 cm by 47 cm.   Zigzag the edges of the fleece together for easier handling. Matching right sides together, sew the fleece piece along the top edge of the flap.

BEFORE you do, pin it in place and give the whole thing a quick eyeball to make sure the flap is the right length to go up just a little beyond the top cut in the main body of the coat.


This is where I added the faux fur flap.  I used the same measurements as the fleece piece above.  It is just essentially a decorative cover.


Lining the raw edge on the inside of the pocket:
The next piece is the fleece that will line the inside of the opening at the top. With the stretch going long ways (and NOT cut on the fold), cut a piece that’s 5 cm by 24 cm


With right sides together (i.e., right side of the fleece with outside of the jacket), line up the edge of the cut along the top of the coat with the fleece piece. Fold over and pin 6mm at each side. Sew right along this edge. Then fold the piece of fleece around the raw edge of the coat/fleece seam to the inside of the coat. Pin it in place, and sew right on the original line of stitching. (you may need to fiddle a tiny bit to hide the seam allowances on the edges.) This makes a really nice soft edge for your baby’s face.


Putting it all together:
Matching ride sides together, line up and pin the flap to the coat body.

Starting from the bottom, sew, leaving a bare 3 mm seam allowance. Makes sure to catch the raw edges at the top. I ended up doing a little top stitching at the top corners to reinforce the connection.


The only thing that I would add would be a drawstring of some sort to adjust the opening of the pouch along the top rail.  Sometimes I could feel the cold air coming in, and that just defies the whole purpose of us wearing a coat!

The finished coat:


Other links to DIY Babywearing coats:

http://www.sedlmeiers.net/photos/Babywearing/BabywearingCoat/instructions.html

http://www.kiddiesgames.com/jacketinserts/

Posted by Angelique